Backyard Permaculture: Our First Design
This project has a special place in our hearts because it was our first design together, as well as the first project we were able to actually implement.
During our stay in Madison in summer 2019 we offered Steph's parents a permaculture analysis of their backyard. There always seems to be something to do in a garden, so we hoped to put our PDC knowledge to good use and gain more design experience. We were amazed by Beth and Matt's positive reaction to our design and greatful that they asked us to turn our suggestions into reality.
Here you can read more about the five step process we used to to complete our design.
Step 1 - Observation
|
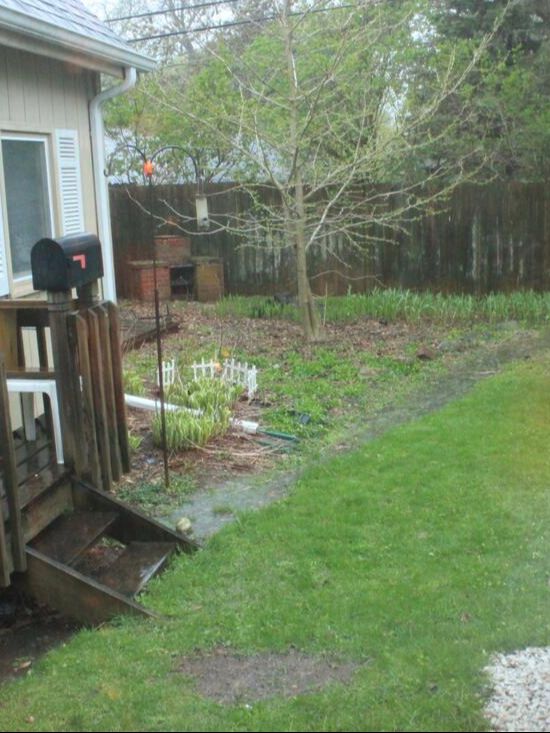
Our observations included a detailed tour of the backyard as well as the front yard. We explored on our own before interviewing Beth and Matt so that we could make unbiased observations.
Both our own observations and the interviews made one thing very clear: the most urgent issue to address was the drainage problem! Another important observation was that Beth and Matt didn't like to spend time at the firepit area because it wasn't very inviting. We also observed that the large lawn area was heating up the yard and house. |
|
|
Step 2 - Analysis
Once we felt we had observed the yard deeply, we made maps of different aspects of the yard to better analyze what factors were interacting in the space. These maps included a base map, zone map, sector map and a water flow and storage map. You can find the maps as a slideshow below.
The map for zone analysis shows how frequently different areas of the yard are visited and used. We drew two conclusions from this map and from discussions with Beth and Matt:
The sector map includes the influence sunlight, wind, and water on the yard. We also included interactions with neighbours, light pollution, noises, and wildlife corridors in our design.
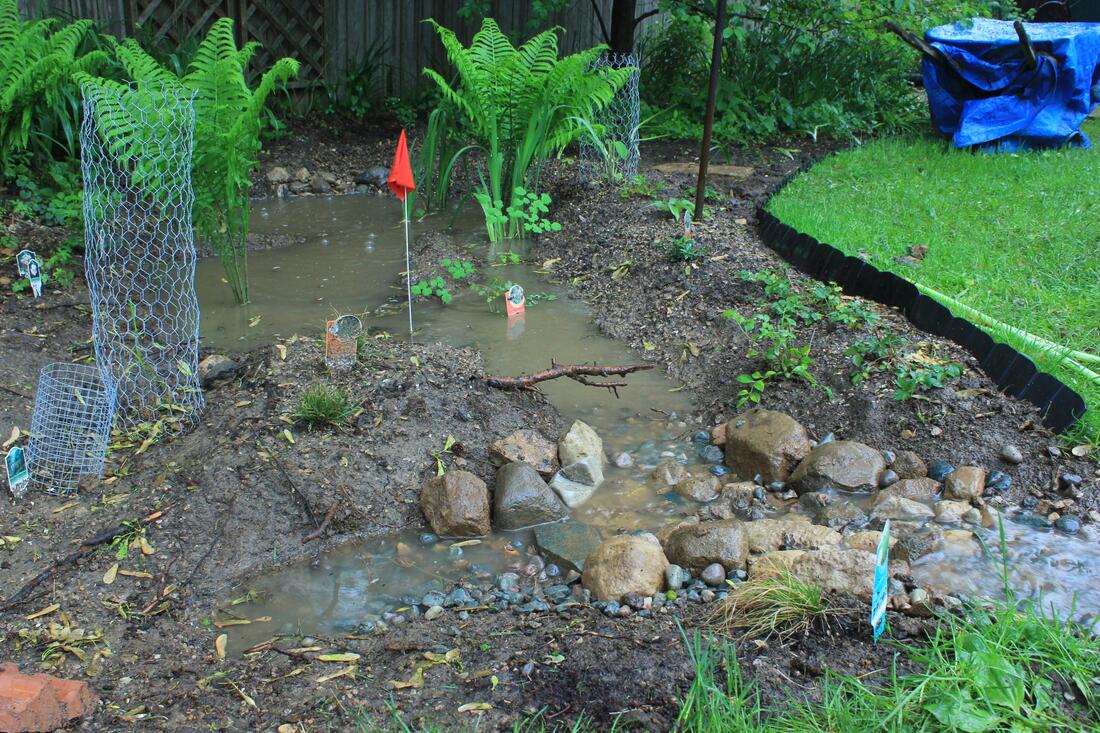
Water had such a huge influence on our design that we analyzed its flow and storage in an additional map. It helped us understand what areas were designed well and which needed new ideas to both store and move water across the landscape. We observed water pooling during rain showers and the water masses leaving the property towards the neighbours, were the water would accumulate further, creating a larger-scale problem! Our calculations showed that the 1500 ft² (150 m²) roof would fill seventeen 55-gallon rain barrels (a total of 3500 liters) during a rather moderate 1 in (25 mm) thunderstorm. We knew that an additional water barrel would not solve the problem.
The map for zone analysis shows how frequently different areas of the yard are visited and used. We drew two conclusions from this map and from discussions with Beth and Matt:
- The south-east corner of the yard (upper left in the map) is hardly used, and includes an old sandbox and an old fireplace.
- The large lawn area (zone 2) is used infrequently and mostly for mowing. The fire place in zone 3 is disconnected from the frequently used deck (zone 1).
The sector map includes the influence sunlight, wind, and water on the yard. We also included interactions with neighbours, light pollution, noises, and wildlife corridors in our design.
Water had such a huge influence on our design that we analyzed its flow and storage in an additional map. It helped us understand what areas were designed well and which needed new ideas to both store and move water across the landscape. We observed water pooling during rain showers and the water masses leaving the property towards the neighbours, were the water would accumulate further, creating a larger-scale problem! Our calculations showed that the 1500 ft² (150 m²) roof would fill seventeen 55-gallon rain barrels (a total of 3500 liters) during a rather moderate 1 in (25 mm) thunderstorm. We knew that an additional water barrel would not solve the problem.
Step 3 - Design
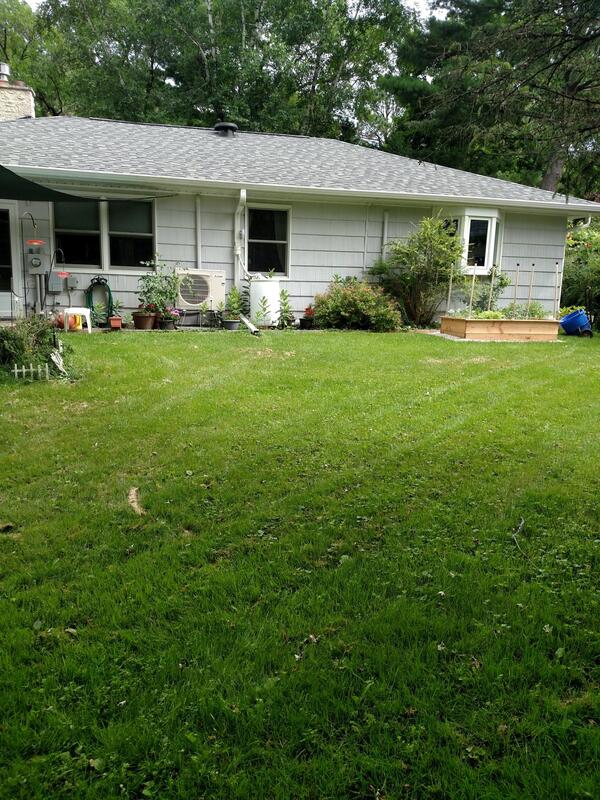
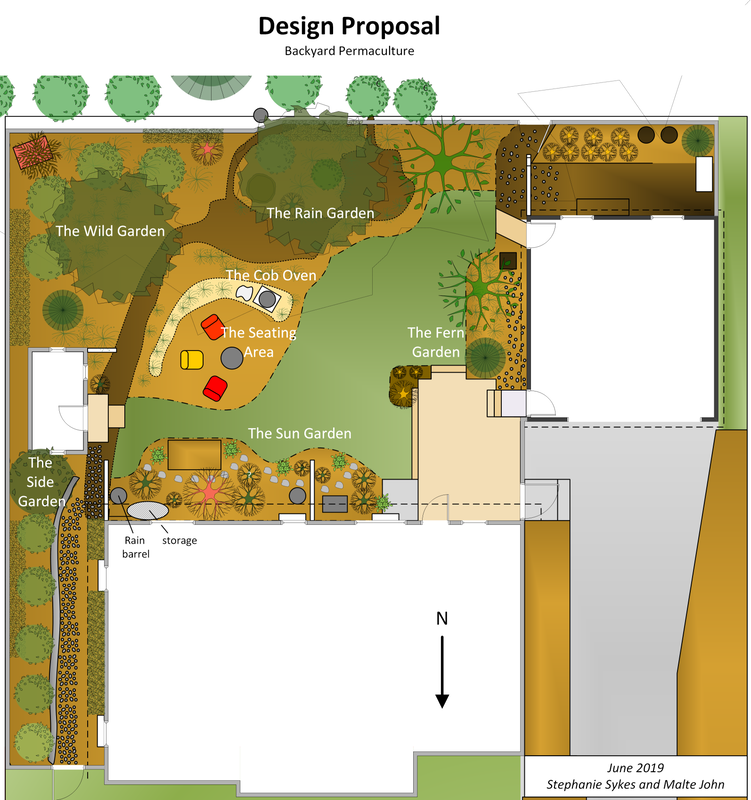
Our observations and analysis were the foundation of our design ideas. Our design proposal is shown in the map below, where we divided the yard into seven mini designs:
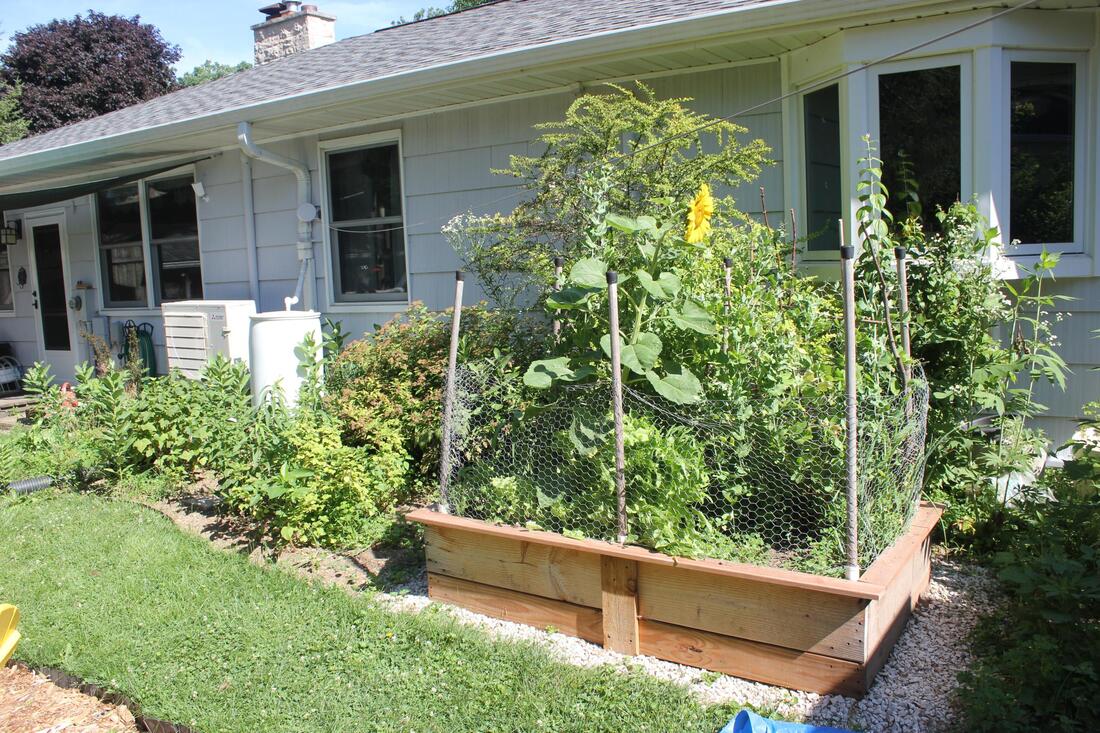
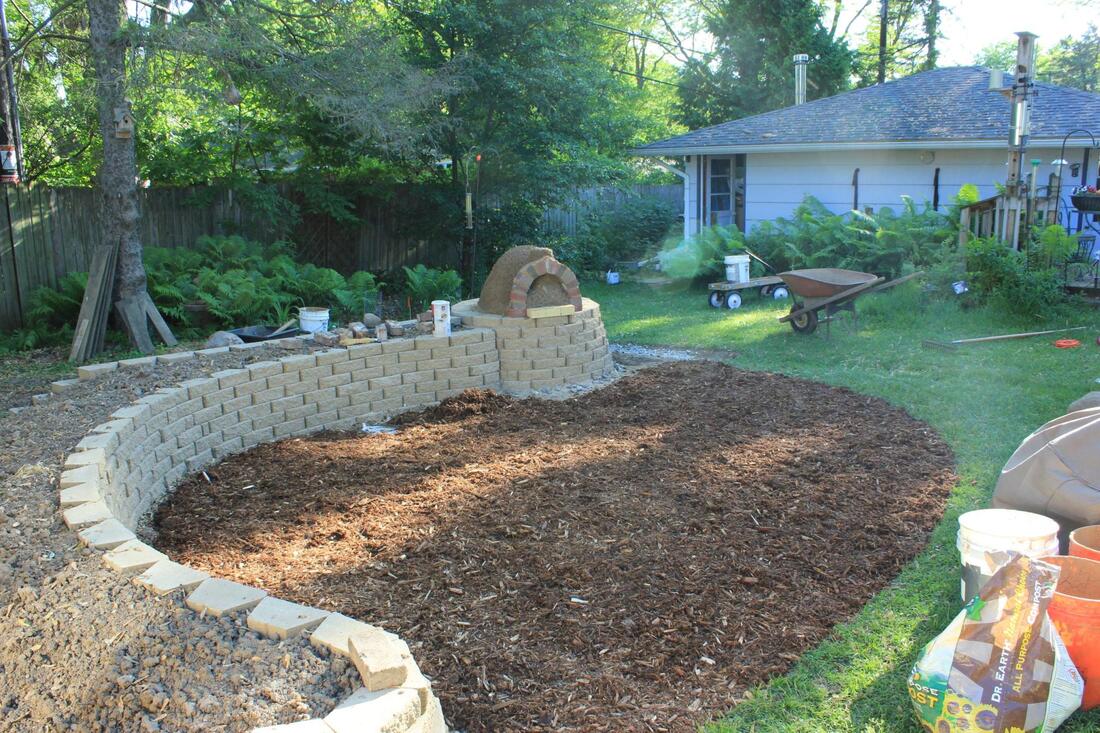
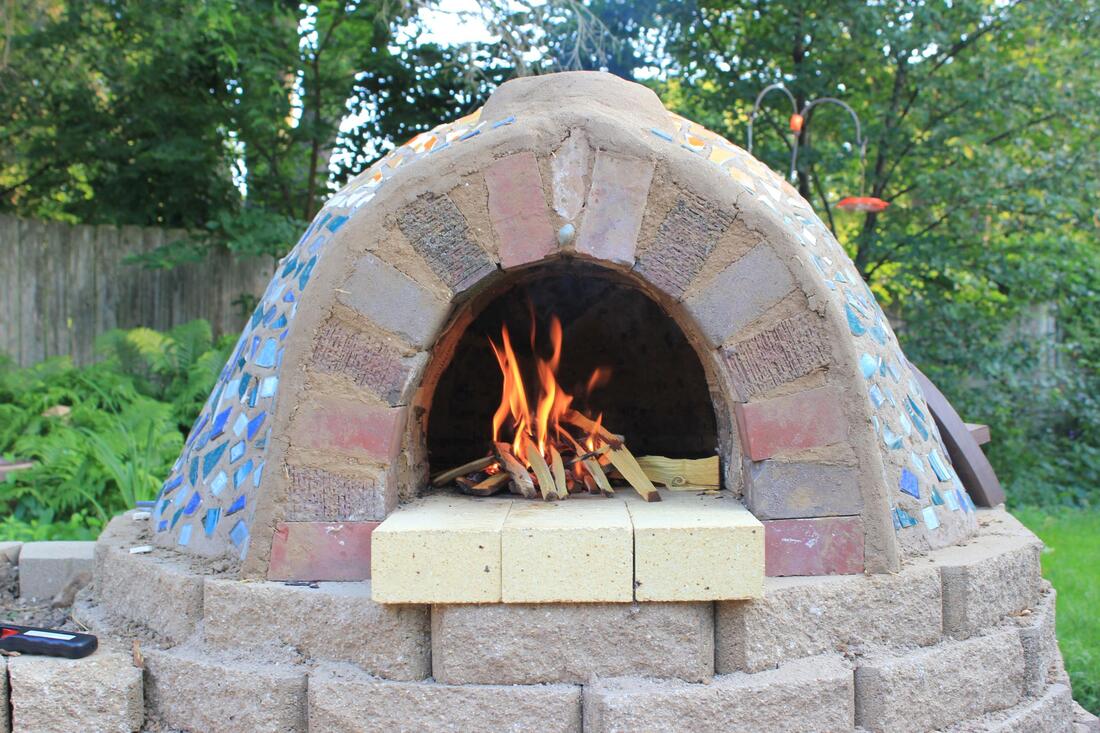
The design of the sun garden extends the existing garden bed on the south-side of the house, where we introduce a variety of native prairie plants as well as edible perennials and herbs. As a shady area that is highly influenced by run-off water, the side garden includes protection from erosion with rocks and ground cover plants. The wild garden is transformed fron an old children's play area into a wildlife habitat, where human influence is minimal. The rain garden is our response to catch and store the water on the site, rather than making it someone else's problem. In the fern garden an unused fence is removed to increase mobility to the compost bins in the winter, and trees are planted for fruit and animal shelter. The seating area is moved and given a defined space with a retaining wall that now houses plant life and makes the fire pit more inviting. Finally, the new cob oven for bread and pizza baking is the focal point of the backyard.
The design of the sun garden extends the existing garden bed on the south-side of the house, where we introduce a variety of native prairie plants as well as edible perennials and herbs. As a shady area that is highly influenced by run-off water, the side garden includes protection from erosion with rocks and ground cover plants. The wild garden is transformed fron an old children's play area into a wildlife habitat, where human influence is minimal. The rain garden is our response to catch and store the water on the site, rather than making it someone else's problem. In the fern garden an unused fence is removed to increase mobility to the compost bins in the winter, and trees are planted for fruit and animal shelter. The seating area is moved and given a defined space with a retaining wall that now houses plant life and makes the fire pit more inviting. Finally, the new cob oven for bread and pizza baking is the focal point of the backyard.
Step 4 - Realization
Finally it was time for action! Click on the links below to learn about four of the projects in more detail:
Step 5 - Celebration
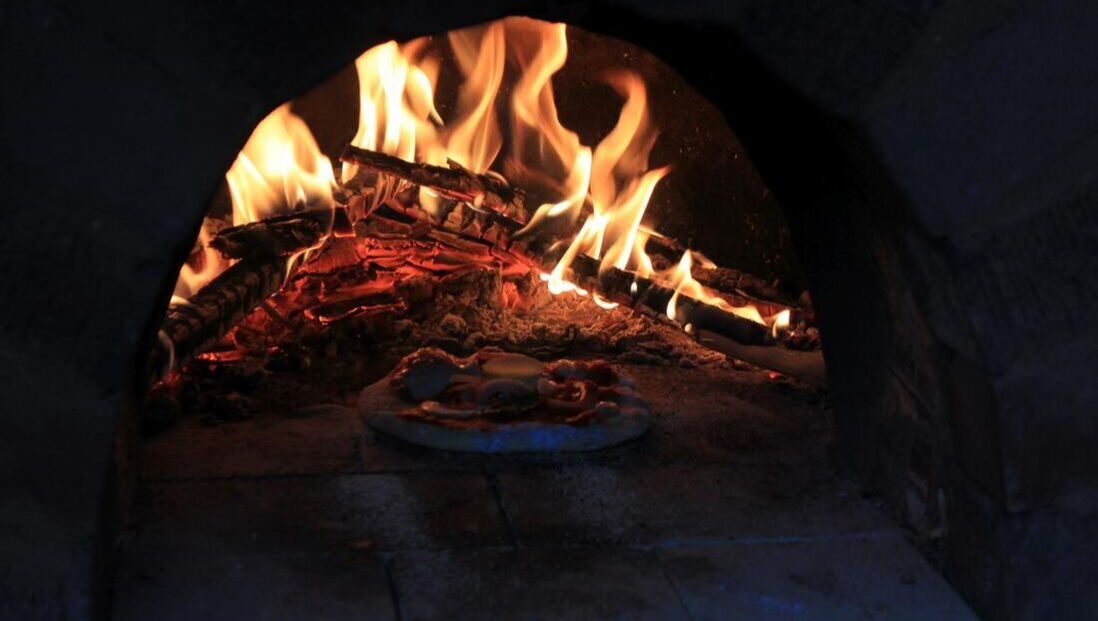
Celebration is such an important part of the project. Obviously we had to celebrate the first firing of the oven with friends and family by baking pizza and bread. To present our project to a broader group of people, we opened the garden for two tours. In July and August 2019, the Spring Harbor Garden Club and the Madison Area Permaculture Guild visited to hear us talk about our ideas, learning process, and final results.
Now is also a good time to critically look back at our design. Of course, there are parts that we would do differently next time: using different materials, trying to get even more materials for free, and choosing different places for certain plants. Overall, we are very happy with our project and we are very grateful that we had the chance to complete this massive project!
Now is also a good time to critically look back at our design. Of course, there are parts that we would do differently next time: using different materials, trying to get even more materials for free, and choosing different places for certain plants. Overall, we are very happy with our project and we are very grateful that we had the chance to complete this massive project!
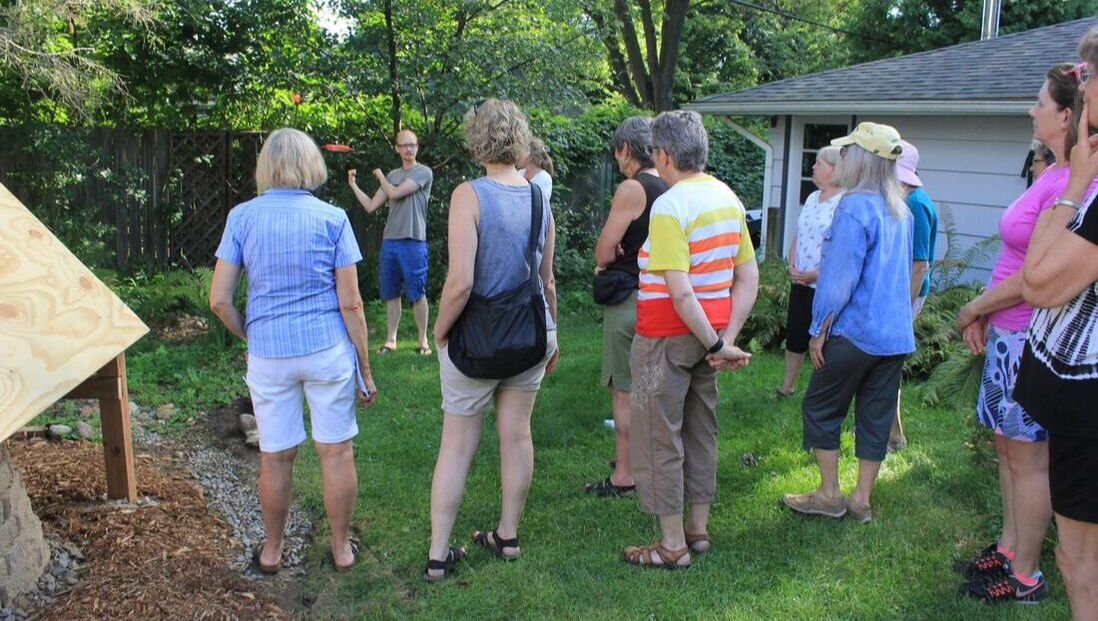
A tour with the Spring Harbor Garden Club.