Backyard Permaculture - The Cob Oven
|
The Cob Oven is a bread and pizza oven hand-sculpted out of a sand-clay mixture.
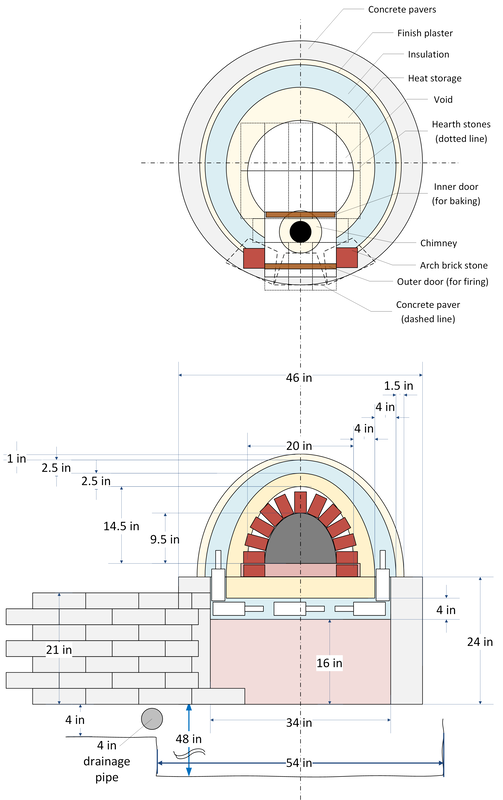
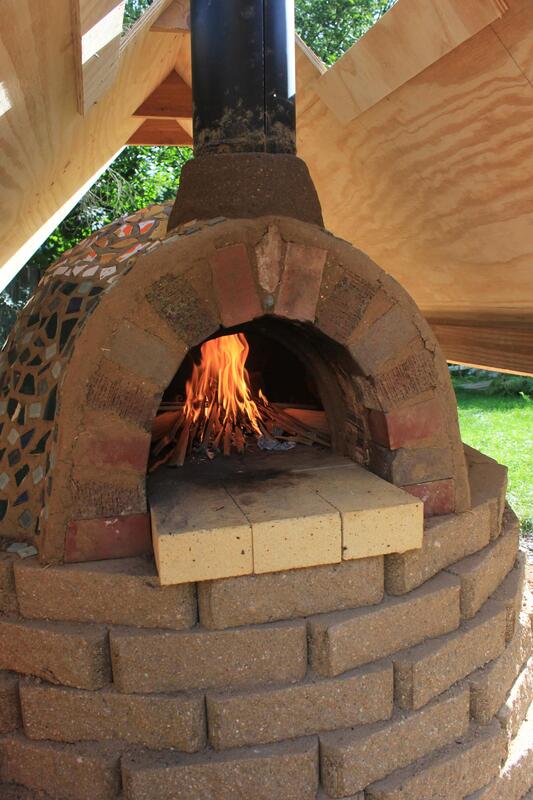
You can find our draft of the oven in the figure to the right. It is based on a design in Kiko Denzer's book "Build Your Own Earth Oven". The dome itself consists of three layers: a heat storing layer, an insulation layer and the finish plaster with decorative elements. We included a chimney to keep the smoke out of the baker's face and a brick arch in the front to add stability and beauty. The oven's baking stones rest on a cob base, which itself is embeded in an insulation layer of glass bottles. We used the same kind of concrete pavers to raise the oven from the ground that we used to build the retaining wall. This created continutiy and anchored the retaining wall into the surrounding area. The whole construction rests on a 4 foot deep foundation of crushed rock and bricks. Aside from Kiko Denzer's book, we also used some online sources to complete our design. Here are some links, if you are interested:
|
|
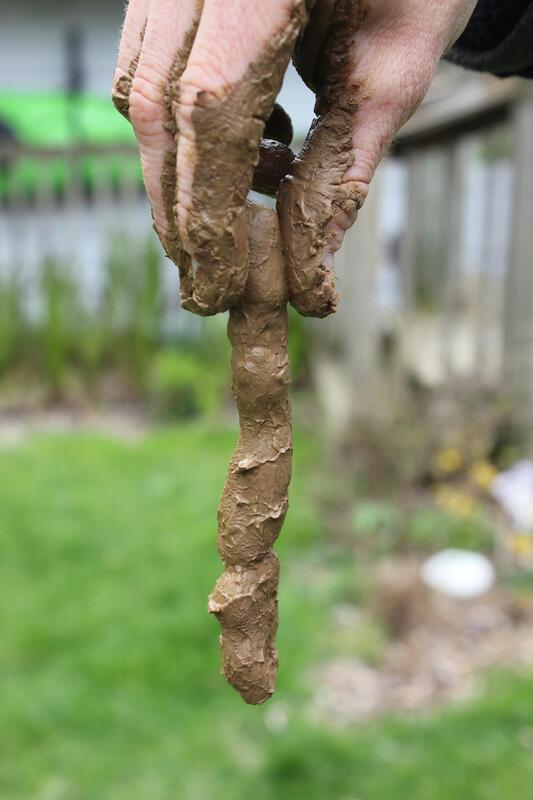
Step 1 - Test the SoilWe tested the soil for its clay/silt/sand content in order to decide if it is appropiate for making cob. From Wisconsin soil maps we expected this area to be silty.
We dug a two foot (60 cm) deep hole and the consistantly shiny, straight sides already had us certain that it was heavy clay. We were quite surprised! It was sticking to our hands as a shiny coating and we were able to form the soil into figures and long sausages. This was great news for our cob oven project. We just need to add sand! |
|
|
|
|
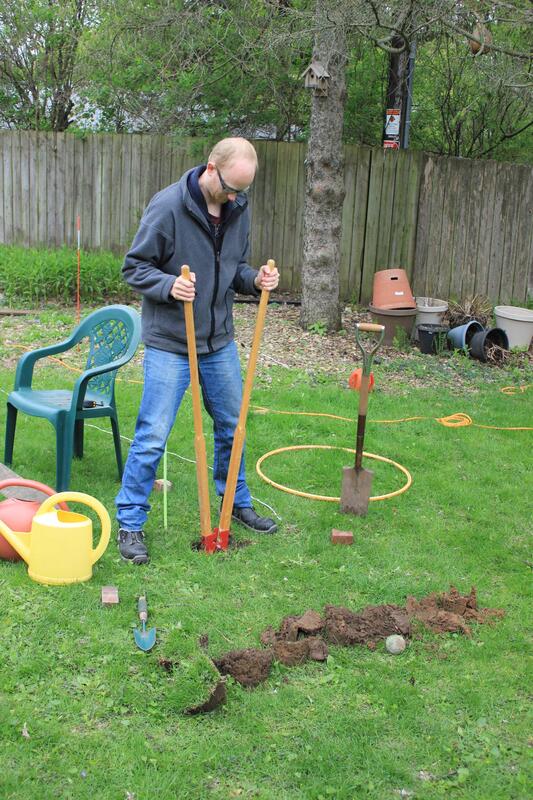
Step 2: Digging the Foundation
Wisconsin has a harsh winter with large temperature swings. If we wanted to avoid the oven sinking into the ground over time, we had to rest its weight on a layer that is below the frost line. Unfortunately the recommended frost line for construction in Wisconsin's building codes is 4 feet deep (1.20 m).
To dig that deep we had to move a lot of earth and large stones that were heavy to lift. We learned that the average frost depth is much lower than 4 ft and the building codes are intended for houses more than ovens. Did we overdoo it or just ensure that the oven has a foundation that wont move? Well, at least we are on the safe side. |
Step 3: Filling the Foundation
We filled the hole with layers of crushed limestone and urbanite (concrete and old bricks with mortar) from the old masonry fireplace that we took down. We build a berm around the oven's foundation to redirect rain water away from our foundation hole after it flooded.
|
|
|
|
Step 4: The Base
We used concrete pavers to form a circle, leveled the stones and filled the void with crushed stones and urbanite. We learned that leveling stones is a lot of work!
|
Step 5: Insulation
To stop the heat of the oven from traveling into our stone base, we used a mixture of chopped straw and clay soil. A collection of glass bottles helped to create insulative air pockets, like double pane windows.
|
|
|
|
Step 6: Thermal Storage
An important factor for baking crunchy breads and pizza crusts is maintaining a stable high temperature in the oven. This requires a large thermal mass that is embedded into the insulation layer. We formed this layer of 1 part clay and 3 parts sand.
We used a board for leveling. Some minor cracks occured after drying, which we didn't worry about. |
Step 7: Laying the Hearth Stones
We used 15 hearth stones to create the baking area including some extra stones for the inlet with a small overhang to simplify cleaning of the baking area.
We soaked the stones shortly in water (for a couple of minutes until the major bubbling stopped) to enhance bonding to the thermal mass layer. |
|
|
|
Step 8: Building the sand dome
We reused the damp sand from the old sand box to form the void of the dome and the inlet. It was like building a sand castle!
|
Step 9: The Brick Arch
We built the brick arch out of reclaimed stones from the masonry oven we demolished. We split them in half using chisels and balanced them with small pebbles.
It took us two tries and a whole day to get it right, but the arch is stable! Once the keystone was in place, we filled in the gaps between the stones with a sand-clay mortar. |
|
|
|
Step 10: Dense Oven Mud Layer
The first layer of the dome, called "dense oven mud" by Kiko Denzer, is made out of a high proportion of clay to add to the thermal mass if the oven.
Before applying the oven mud we layed sheets of wet newspaper to make it easier to dig out the inner layer of sand once the oven is dry. We created shallow holes on the surface of the mud layer for better connection with the next layer. |
Step 11: Insulation Layer
The second dome layer insulates the thermal mass of the oven from the air outside. It is made out of a mix of clay, sand and straw. This is a typical "cob" mixture - often used in natural building.
|
|
|
|
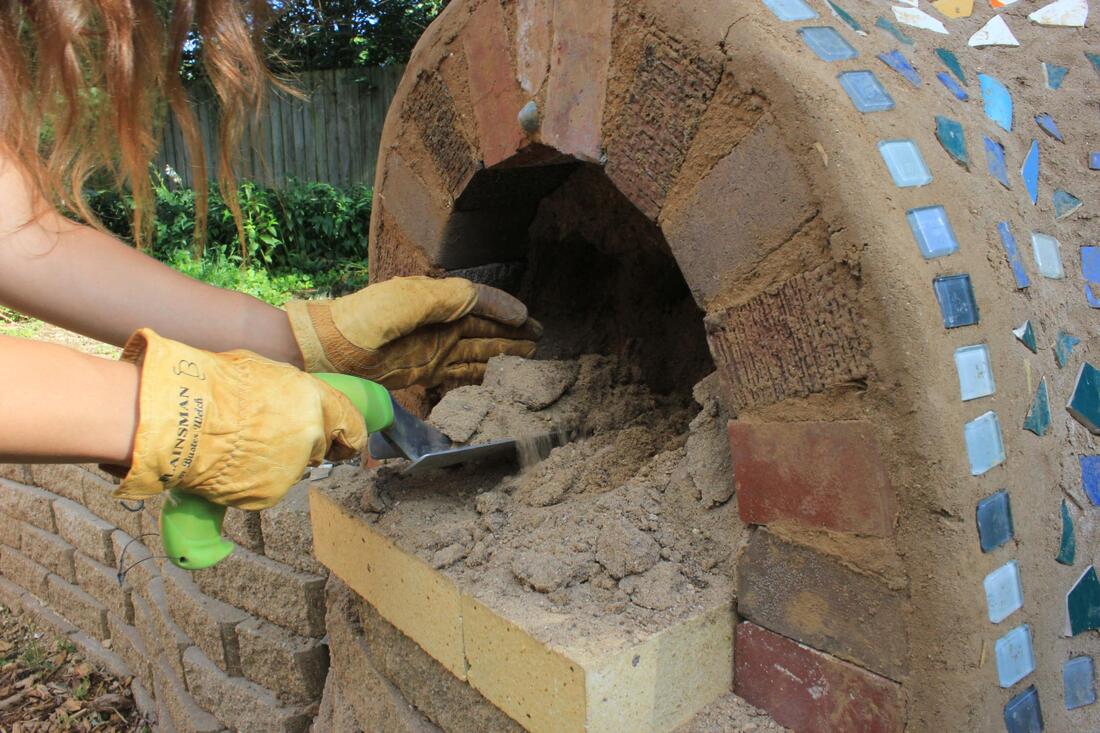
Step 12: Finish Layer
We finished the dome with a thin coat (1/2 inch thick) of sand-clay plaster. We brok old dishware to create a mosaic pattern on the surface of the oven.
It was difficult to press the mosaic pieces into the plaster! If we did this again we would make the plaster a little thicker and the mosaic pieces a little smaller. Trust us, it will save you a lot of thumb pain. |
Step 13: Removing the Sand and First Firing
|
The oven dried for about a month before it was finally time to remove the inner sand layer. Using our hands and a trowel we scraped and shoveled sand out of the oven cavity, being careful not to dig past the newspaper layer.
When the sand was out it was clear that the inside of the oven was still moist. We lit a small fire in the oven to assist in the drying process. |
|

|
Step 14: Building the Roof
|
|
We decided to build a ridge roof for the oven to protect it from rain and icy Wisconsin winters. We wanted to have a small roof that is not dominating the view of the garden, a chimney for good draft, and a good protection of the oven from rain and icy Wisconsin winters. So we made a compromise in size. A part of the roof is actually removable, so the chimney can be attached during a firing of the oven. The actual roof consists of cedar shingles on plywood.
This was our first roof, we ever build and there is room for improvement. In future projects we would try to avoid using plywood and choose local eastern white cedar shingles over imported western red cedar. |
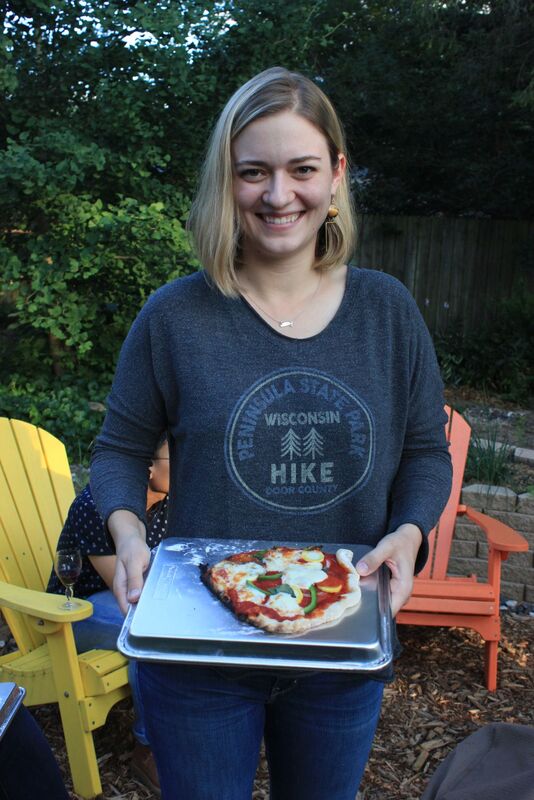
Step Fifteen: First Baking
|
All the efford was reworded with some yummy pizza, followed by sourdough bread baking. Baking in a clay oven definitely requires a different skillset compared to an electric thermostat controlled oven. This oven has character and baking becomes a ritual, requiring time and patience. When properly heated, the baking goods have a good crust and a pleasant smoky flavor.
|
|
|
